
Roof Repairs: A Step-by-Step Guide to Finding and Fixing Commercial Roof Leaks
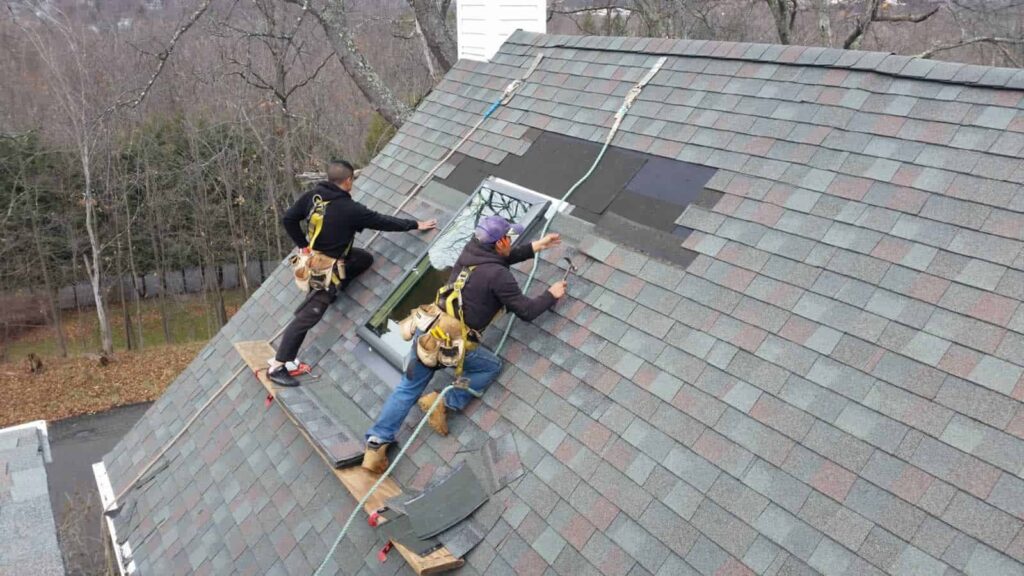
You walk into your commercial building after a night of rain and notice a dark stain spreading across a ceiling tile. Maybe there’s a slow drip near an exterior wall. Maybe an employee has already placed a bucket underneath it. Your first instinct is understandable: find the spot directly above the water and repair it.
But commercial roof leaks aren’t always that straightforward.
Water can enter at one location and travel before becoming visible inside the building. That means effective Roof Repairs should begin with diagnosis rather than assumptions. The goal isn’t simply to cover the place that looks suspicious. It’s to identify the likely entry point, understand the surrounding roof condition, complete a compatible repair, and document what happened.
This three-step process gives building owners and facility managers a practical way to respond when water appears inside a commercial property—without turning every leak into either a quick patch or an automatic roof replacement.
⚠ WARNING
Do not assume the roof entry point is directly above the interior stain. Water may travel through or along components of the roof and building assembly before it becomes visible indoors.
Step 1: Document the Leak Before You Try to Diagnose It
Your first job isn’t to climb onto the roof. It’s to capture useful information while the evidence is still fresh.
Start by protecting the interior area. Move vulnerable equipment, inventory, furniture, or other materials away from active water where this can be done safely. Follow appropriate building procedures for electrical hazards or other conditions affected by water.
Then document exactly what you’re seeing.
- Record the location. Identify the room, floor, wall, ceiling area, or other interior reference point where water appeared.
- Note the timing. Write down when the leak was discovered and whether water is still entering.
- Record weather conditions. Was there heavy rain, prolonged light rain, wind-driven rain, or another recent weather event?
- Take photographs. Capture the stain, drip location, affected materials, and surrounding interior area.
- Review previous incidents. Check whether the same part of the building has experienced water intrusion before.
- Preserve repair history. If previous roof work was performed nearby, make that information available to the roofing professional.
Why does this matter? Because leak behavior can provide diagnostic clues. A leak that appears only during wind-driven rain may tell a different story from one that occurs during prolonged rainfall. A stain that returns in exactly the same place after multiple repairs deserves different attention from a completely new isolated event.
✓ LEAK DOCUMENTATION CHECKLIST
✓ Photograph interior evidence
✓ Record date and approximate time
✓ Note recent weather conditions
✓ Identify affected rooms or areas
✓ Check previous leak records
✓ Record whether the leak is active or historical
One piece of information is especially valuable: pattern. If you’ve had three leaks over two years, don’t treat them as three unrelated invoices until you’ve looked at where they occurred. Mapping them may reveal recurring problems around a particular roof area, drainage zone, equipment cluster, or type of detail.
TIP
Create a simple leak log for the building. Record the date, interior location, weather conditions, suspected roof source, completed repair, and whether the issue returned. A small amount of documentation can become extremely useful as the roof ages.
Once the interior evidence is documented, the next step is to move from the symptom to the cause.
Step 2: Trace the Cause, Not Just the Symptom
This is where professional roof evaluation becomes important. Commercial roofs contain many potential water-entry locations, and safely accessing and evaluating those areas requires appropriate training, equipment, and procedures.
For a Roof Leak Repair in Folsom, the inspection shouldn’t focus only on a single point that appears to line up with the interior stain. The surrounding roof area and relevant details should be considered as part of the investigation.
Depending on the roofing system and building configuration, the inspection may consider:
- Roof membrane or surface condition
- Seams and joints
- Flashing and transitions
- Pipes, vents, and other penetrations
- HVAC and equipment curbs
- Drains and scuppers
- Parapet and wall interfaces
- Previous patches and repairs
- Punctures or mechanical damage
- Areas exposed to repeated rooftop traffic
At this stage, leaks often fall into one of three practical scenarios.
Scenario 1: A localized defect can be reasonably identified. Perhaps there is damage associated with a penetration, flashing condition, seam, or other defined roof detail. If the surrounding system remains serviceable, a targeted repair may be appropriate.
Scenario 2: Several possible entry points exist. The interior symptom may correspond with an area containing multiple penetrations, older repairs, transitions, or other conditions. More investigation may be necessary before selecting the repair location.
Scenario 3: The leak is part of a larger pattern. If water intrusion keeps appearing in different parts of the building, or if the roof contains numerous deteriorated areas and repeated repairs, the problem may no longer be best understood as a single isolated defect.
⚠ WARNING
Avoid treating repeated leaks as unrelated events without reviewing the broader roof condition. A growing repair history can indicate that the building needs a more comprehensive assessment.
Moisture within the roofing assembly can complicate the investigation further. When roof history, visible conditions, or other evidence suggests that water may have affected underlying materials, additional evaluation may be appropriate. Simply sealing the visible surface does not establish what is happening below it.
Drainage should also be part of the conversation. If water repeatedly collects in certain locations, a repair to a nearby seam or penetration may address one deficiency without addressing why that area experiences unusual water exposure. Drains, scuppers, and water pathways need to be evaluated on their own terms.
TIP
Mark completed repairs on a roof plan, aerial image, or facility drawing. Over time, the pattern can help distinguish isolated defects from recurring problems concentrated in particular roof areas.
✓ DIAGNOSTIC CHECKLIST
✓ Compare interior evidence with roof conditions
✓ Review nearby flashing and penetrations
✓ Inspect relevant seams and transitions
✓ Evaluate previous repair locations
✓ Consider drainage behavior
✓ Look for patterns across the repair history
✓ Investigate moisture concerns where appropriate
Once the likely cause has been identified, you can finally move to the part most people think of first: the repair itself. But even here, the goal isn’t merely to stop today’s drip. The repair should also tell you something about what the roof needs next.
Step 3: Repair, Verify, and Decide What Comes Next
Once the likely source of water intrusion has been identified, the repair can be planned around the actual roofing system and the condition of the affected area. This is where diagnosis starts paying off. Instead of placing material over the first suspicious-looking location, the repair addresses a defined deficiency.
The exact repair method depends on the roof type, existing materials, location of the damage, and manufacturer or system requirements. A single-ply membrane, built-up roof, coated surface, flashing transition, or equipment curb may each require a different approach.
A practical repair sequence looks like this:
- Define the repair area. Confirm the condition being corrected and identify surrounding materials that may also require attention.
- Prepare the existing surface. Remove or address unsuitable material as required and prepare the area for a compatible repair.
- Complete the repair. Use methods and materials appropriate for the existing roofing system.
- Restore related details. Address flashing, seams, penetrations, transitions, or other components included in the repair scope.
- Review the completed work. Check workmanship and confirm that the intended deficiency has been addressed.
- Document the location. Record photographs, repair materials, date, and relevant observations.
- Monitor the area. Use future weather events and inspections to confirm whether the original symptom returns.
That final step is easy to overlook. A repair can look clean and complete on installation day, but the original problem was water intrusion. Future observation helps establish whether the diagnosis and corrective work actually addressed the issue.
✓ REPAIR VERIFICATION CHECKLIST
✓ Repair matches the existing roof system
✓ Surrounding details were reviewed
✓ Completed work was documented
✓ Interior affected area is monitored
✓ Repair location is added to the roof history
✓ Future inspections include the repaired area
What happens if the leak returns—or a different leak appears somewhere else? That’s when you should stop looking at each service call in isolation and evaluate the direction the roof is heading.
Repair remains appropriate when deficiencies are localized and the surrounding roofing system is serviceable. Restoration may deserve consideration when the roof remains suitable for preservation but requires broader repairs, preparation, detailing, and a protective restoration system. Replacement becomes more relevant when deterioration, moisture-related conditions, substrate problems, or other deficiencies extend beyond a reasonable repair or restoration scope.
⚠ WARNING: REPEATED PATCHING CAN BECOME EXPENSIVE INFORMATION
If service calls keep appearing across different roof areas, don’t simply count how many repairs you’ve paid for. Study where they occurred, why they were needed, and whether the pattern suggests a broader change in roof condition.
This doesn’t mean that several repairs automatically require replacement. Commercial roofs contain many details, and individual problems can occur over time. What matters is whether the repairs remain isolated and manageable or whether they are becoming evidence of more widespread deterioration.
That’s why your repair history is more than paperwork. It is condition data.
TIP
Once a year, review your roof repair log as a whole rather than one invoice at a time. Look for repeated locations, similar failure types, increasing frequency, and areas associated with rooftop equipment or drainage.
From Leak Response to Roof Strategy
A roof leak creates urgency. Water is entering the building, people want the problem stopped, and the fastest possible repair naturally feels like the priority. But once the immediate interior area is protected, a more disciplined process usually produces better information.
Start with documentation. Then diagnose the likely source rather than assuming the interior stain identifies the entry point. Complete a repair that is compatible with the existing roofing system, verify the work, and preserve the information for future inspections.
The complete process is simple to remember:
✓ Document the symptom
✓ Diagnose the likely cause
✓ Repair the actual deficiency
✓ Verify the completed work
✓ Record what was done
✓ Reinspect and monitor
Over time, this approach changes the way you manage the roof. Instead of having a folder filled with unrelated repair invoices, you begin building a history of how the roofing system behaves.
You may discover that most problems are concentrated around a particular group of penetrations. You may notice that drainage-related areas deserve more attention. Or you may find that leaks are appearing across unrelated portions of an aging roof, suggesting that a broader assessment is becoming increasingly valuable.
That information helps you make a better next decision—whether the roof needs another localized repair, is a candidate for restoration, or has reached the point where replacement should be evaluated.
A successful roof repair doesn’t simply stop today’s leak. It gives you better information for tomorrow’s roofing decision.
And that is ultimately the difference between reacting to commercial roof leaks and managing a commercial roofing system. One begins every time water appears inside the building. The other uses each inspection and repair to build a clearer understanding of what is happening overhead.