Dekton Countertops FAQ: Everything You Need to Know Before You Buy

dekton countertops

Dekton is having a moment—and for good reason. This ultra-compact surface is being featured in show-stopping kitchens, designer bathrooms, and high-traffic commercial spaces. If you’ve found yourself searching for dekton countertops and wondering what all the buzz is about, you’re not alone.

In this clean, concise guide (inspired by the thoughtful and modern tone of Shea McGee), we’ll answer your most pressing questions so you can decide if this high-performance material belongs in your home.

Let’s dive in:


❓ What exactly is Dekton?

Dekton is an ultra-compact, engineered surface made from a sophisticated blend of raw materials—think porcelain, glass, and quartz—all fused together through extreme heat and pressure.

In simpler terms:
Dekton mimics natural stone in appearance but takes performance to the next level.


❓ How does Dekton compare to quartz or granite?

FeatureDektonQuartzGranite
Heat resistance🔥 Up to 1000°F, no problem⚠️ Sensitive to heat✅ Naturally heat resistant
Scratch resistance✅ Extremely high⚠️ Can scratch✅ Durable but can chip
Stain resistance✅ Non-porous, stain-proof✅ Non-porous⚠️ Requires sealing
UV resistance✅ Excellent (outdoor-friendly)⚠️ May discolor in sunlight⚠️ May fade over time
Maintenance🧽 Zero sealing, easy to clean🧽 Easy care🧽 Needs periodic sealing

Dekton is especially suited for modern, high-use kitchens where performance and sleek aesthetics are top priorities.


❓ What does Dekton look like?

Beautiful. Sleek. Modern.

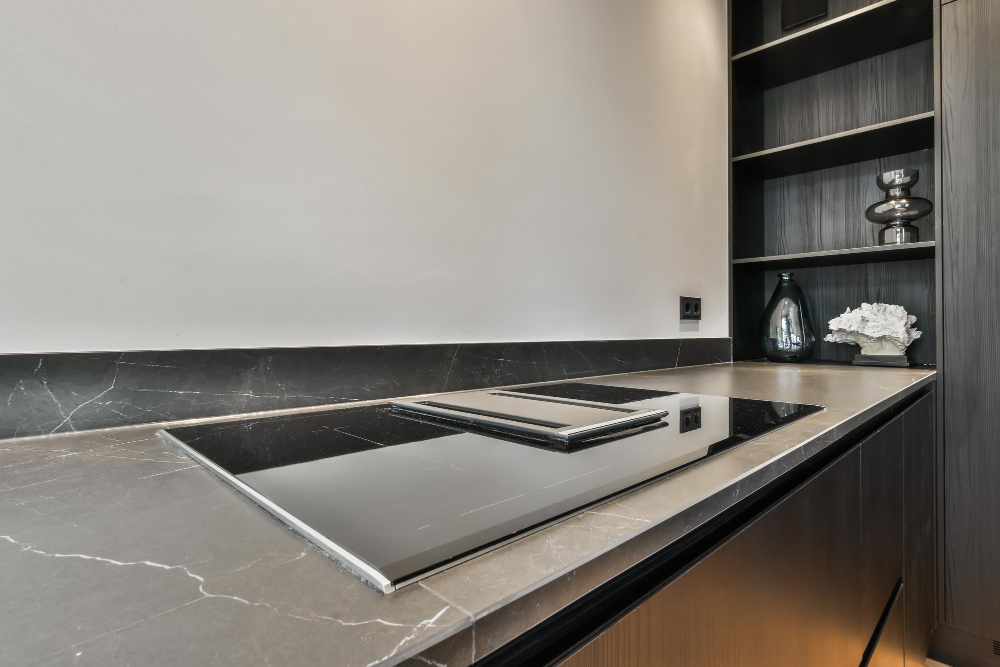
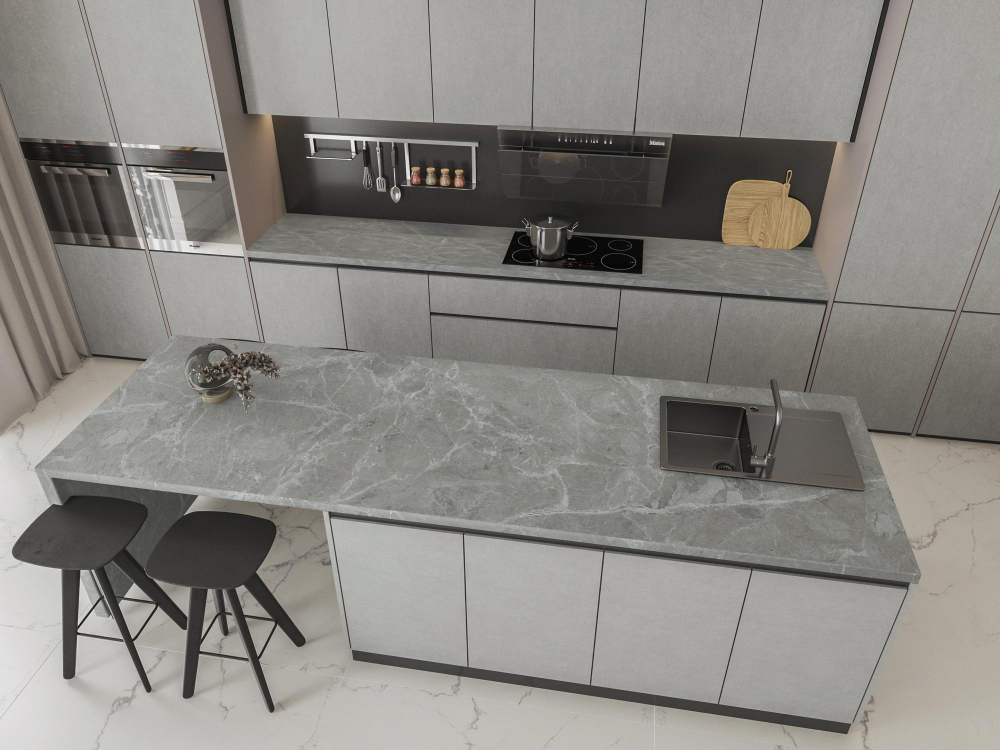
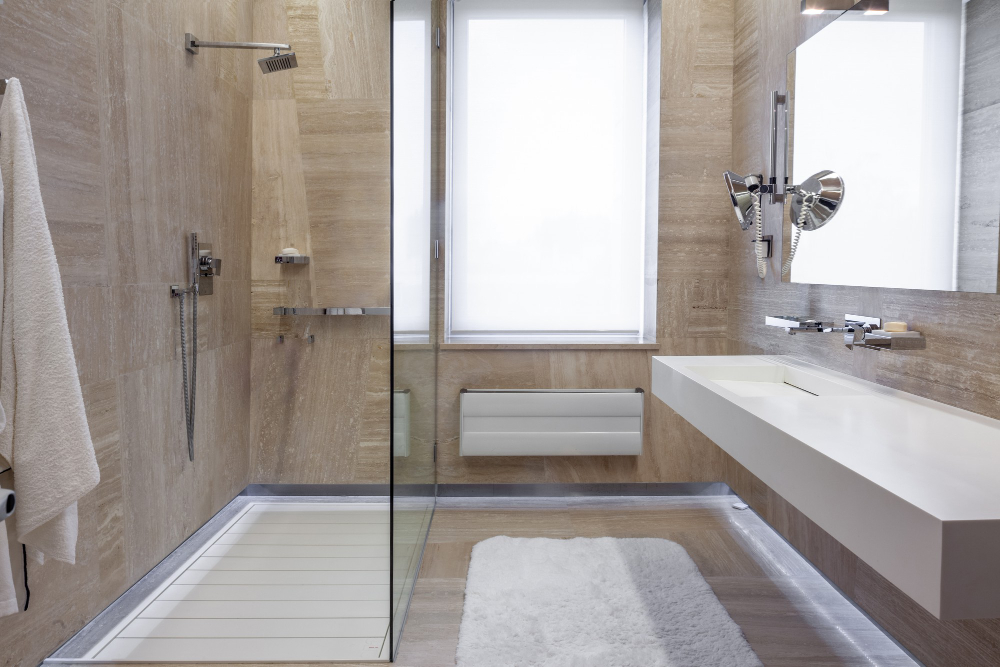
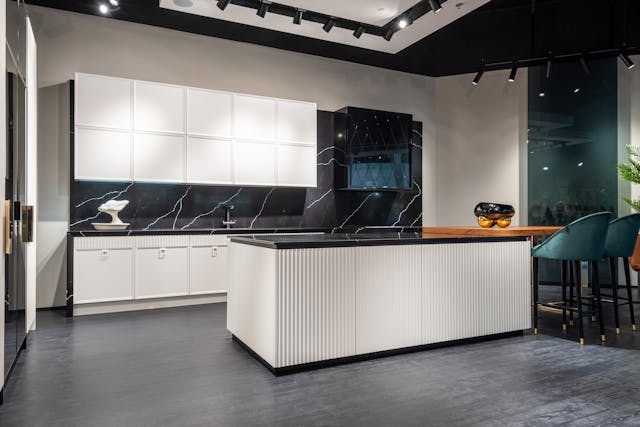
Dekton comes in a variety of finishes—from natural stone looks like marble and slate to industrial tones like concrete, rusted steel, or matte black. The surface options range from polished to textured, depending on the style of your space.

💡 Design Tip: Pair a matte Dekton countertop with warm oak cabinetry and brass fixtures for a clean, elevated aesthetic.


❓ Is Dekton only for kitchens?

Not at all. Dekton is versatile enough for:

  • Bathroom vanities

  • Outdoor kitchens

  • Wall cladding

  • Fireplace surrounds

  • Furniture tops

Thanks to its UV resistance and durability, it’s one of the few high-end materials equally at home indoors and out.


❓ Can Dekton chip or crack?

Dekton is extremely durable, but like any hard surface, it can chip at the edges if hit with strong force—especially on thin profiles (like 12mm).

Solution: Choose mitered or eased edges to minimize risk, and always work with a professional fabricator.


❓ How thick is Dekton?

Dekton slabs come in 4mm, 8mm, 12mm, and 20mm thicknesses. For countertops, 12mm or 20mm is standard.

  • Thinner slabs are ideal for wall cladding and furniture

  • Thicker options offer visual weight and durability in kitchens


❓ What colors are available?

Dekton offers over 50 styles, ranging from:

  • Bright whites and veined marble (like “Aura” or “Entzo”)

  • Industrial grays and blacks (like “Kovik” or “Kelya”)

  • Earthy tones and concrete-inspired surfaces

The design possibilities are nearly endless, making Dekton perfect for modern and transitional styles alike.


❓ Is Dekton expensive?

Yes—and no.

  • Dekton typically costs $90–$140 per square foot installed

  • More expensive than laminate or standard quartz

  • But less than many premium natural stones (like marble)

👉 Think of it as a long-term investment in durability and aesthetics.


❓ How do I maintain Dekton?

The best part? Dekton is nearly maintenance-free.

  • No sealing

  • No special cleaners

  • Just mild soap and water

Even stubborn marks like wine, oil, or coffee wipe away effortlessly. It’s ideal for busy kitchens where style and practicality need to coexist.


❓ Is Dekton the right choice for me?

Choose Dekton if you want:

  • A modern, durable, ultra-low-maintenance surface

  • A clean aesthetic with high visual impact

  • Countertops that can handle heat, spills, and wear with ease

  • A seamless, minimal look (Dekton is often used for waterfall edges and full-height backsplashes)

⚠️ Consider another option if:

  • You prefer warm, organic materials like wood or butcher block

  • You’re on a tight budget

  • You want a traditional, rustic look


Final Thoughts: Design-Forward, Function-First

If you’re after a surface that’s as beautiful as it is bulletproof, Dekton countertops might be your match.

From busy kitchens to outdoor dining zones, this modern material checks all the boxes: style, durability, low maintenance, and high-end appeal.

And the best part?
You’ll never have to worry about that hot pan again.

dekton countertops

Small Bathroom Remodel: You Asked, We Laughed (Then Answered)

Thinking About a Sacramento Bathroom Remodel? These FAQs Might Just Convince You

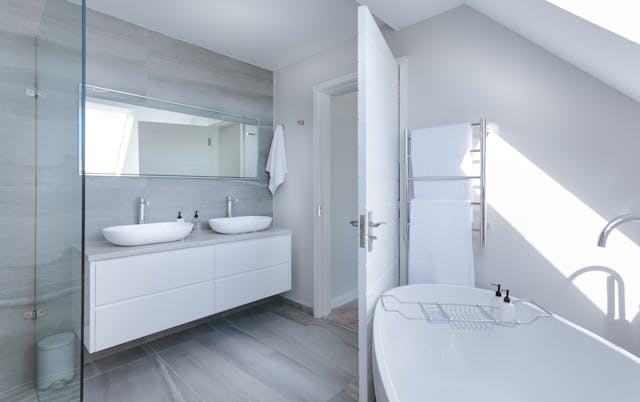
Let’s face it: remodeling a small bathroom can feel like trying to host a dinner party in a phone booth. You’ve got zero storage, one sad towel bar, and a toilet that practically touches the sink. But fear not—we’ve gathered the most common (and slightly ridiculous) questions homeowners ask before upgrading their compact powder rooms or guest baths. We laughed. We totally related. And now? We’re giving you the real answers—with humor, heart, and actual solutions.


🤔 FAQ #1: Can I remodel a small bathroom on a budget?

Short answer: Yes.
Long answer: Also yes, but you might have to give up your dream of heated towel floors imported from Italy.

Ty’s Tip: Start with what matters most—function, lighting, and storage. A fresh coat of paint, new hardware, and a smarter layout can completely transform your space without gutting your wallet. Save the splurges for one standout feature, like a statement mirror or chic faucet.


🛁 FAQ #2: Should I keep the tub or install a shower?

A hot debate, especially if you’ve spent the last decade tripping over the side of that weirdly shallow tub.

Real talk: If you don’t use your bathtub regularly, switching to a walk-in shower can create visual space and add serious functionality. Just make sure you’re not reducing resale appeal if your home has no other bathtub.

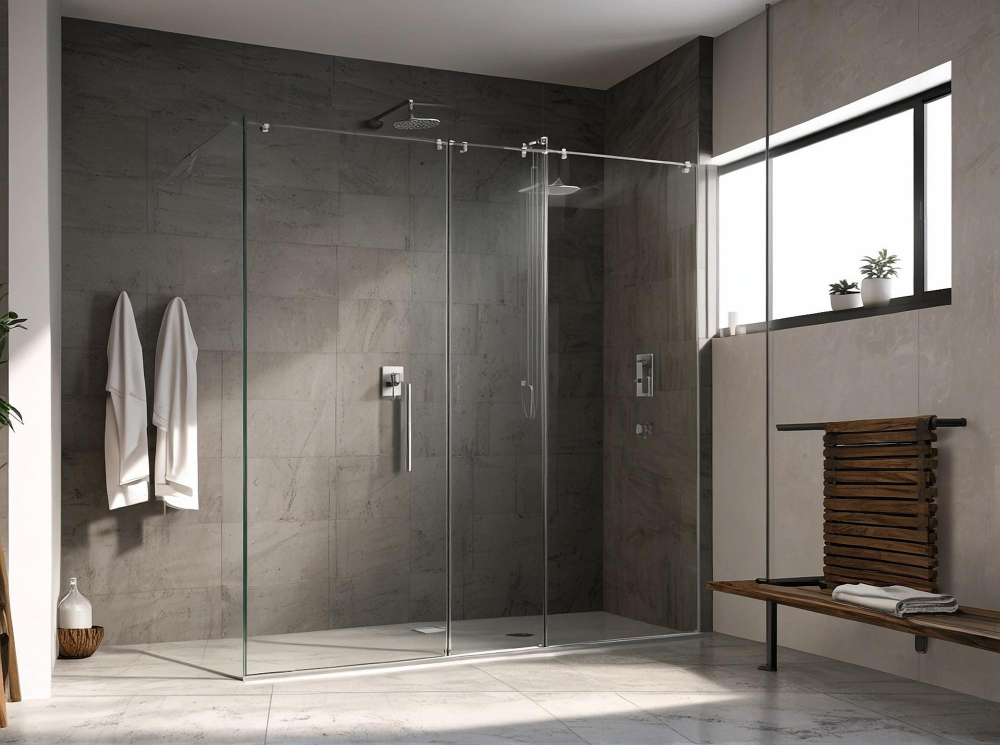
Bonus: Frameless glass makes everything look bigger. It’s basically the Spanx of bathroom remodels.


🎯 FAQ #3: What’s the biggest mistake people make with small bathrooms?

Easy: Overdesigning.

We get it—you want your bathroom to look like a luxury spa in Bali, complete with teak walls, mood lighting, and a rainfall shower. But in a 5×7 room? That’s a fast track to chaos.

Ty’s Tip: Keep it clean, simple, and smart. Choose a few high-impact finishes and let them breathe. White or light-colored walls, large-format tiles, and floating vanities are your best friends.


📦 FAQ #4: Is there such a thing as too much storage?

In theory, no. In reality, yes—especially in small spaces.

Stuffing a giant cabinet into a tiny room doesn’t equal better storage; it equals more bruised elbows. Use vertical space instead:

  • Recessed medicine cabinets

  • Wall-mounted shelves

  • Built-in niches in the shower

And pro tip: not every item needs to live in the bathroom. Your Costco-size shampoo collection? That’s what closets are for.


💡 FAQ #5: Do I really need a lighting plan?

Yes. Yes. And also… yes.

Bad bathroom lighting can make you look like an extra in a horror film. And nothing says “relaxing self-care space” like fluorescent shadows under your eyes.

Ty’s Tip: Use layered lighting:

  • Overhead light for general brightness

  • Vanity lighting (on both sides of the mirror if possible!)

  • Accent lighting (under-cabinet LEDs add style without taking up space)

Bonus: A well-lit bathroom feels bigger and more expensive—without actually being either.


🧼 FAQ #6: How do I make a tiny bathroom feel bigger?

You can’t knock down walls, but you can trick the eye. Here’s how:

  • Large mirrors expand space and reflect light

  • Monochrome color palettes reduce visual clutter

  • Wall-mounted toilets free up floor space

  • Sliding or pocket doors are game-changers if you’re short on swing room

It’s basically design sorcery. But legal.


🔧 FAQ #7: Do I need a professional for a small bathroom remodel?

Only if you like things like plumbing that works, tile that doesn’t fall off, and permits that don’t get you fined.

Even in small spaces, things can get complicated quickly. Hiring pros saves time, stress, and possibly your marriage. If your idea of “DIY” is watching YouTube with pizza in hand, let someone else handle the tools.


🎉 Final Answer: Is it worth it?

Absolutely. A small bathroom remodel is one of the highest-impact, highest-ROI home upgrades you can do. It adds comfort, value, and just a little bit of magic to your daily routine.

And while it might not be the most glamorous space in the house, it can become one of the smartest and most stylish—with a little planning, a lot of laughter, and the right team.

small bathroom remodel

Shower Replacement Costs: Everything You Were Afraid to Ask (But Should)

Thinking About a Sacramento Bathroom Remodel? These FAQs Might Just Convince You

Let’s face it — nobody dreams about replacing their shower. It’s not glamorous. It’s not fun. And unless you’re starring in your own HGTV show (call me), it’s probably not high on your bucket list. But when the tile starts cracking, the leaks won’t quit, or the avocado green walls start haunting your dreams… it’s time.

And if you’re wondering what shower replacement costs really look like, you’re in the right place. No fluff. No scare tactics. Just real answers, a few laughs, and maybe a gentle nudge toward that upgrade you’ve been avoiding.


1. Okay, let’s cut to it — how much does a shower replacement actually cost?

It depends (of course it does). But here’s the breakdown:

  • Basic prefab shower unit: $1,000–$3,000 (labor included)

  • Mid-range tile shower: $4,000–$7,000

  • High-end custom walk-in shower: $8,000–$15,000+

Prices include demo, plumbing tweaks, materials, and installation. Want to move your shower across the room? Add a rainfall head? Install body jets? You’re in spa territory now — and the price tag will follow.


2. Why does the price vary so much? Are the tiles made of gold or something?

Sadly, no. But several things affect shower replacement costs:

  • Type of shower (prefab vs. custom tile)

  • Materials (ceramic, porcelain, natural stone — or yes, even marble if you’re feeling royal)

  • Plumbing changes

  • Shower size

  • Extras like glass enclosures, built-in benches, or niche shelving

It’s a bit like ordering pizza: the basic cheese gets the job done, but the works? That’s gonna cost you extra.


3. Can I just do it myself to save money?

Technically yes. Should you? Only if you’re really handy and enjoy problem-solving under pressure and have a backup bathroom when things go sideways.

Replacing a shower involves:

  • Demolition (read: sledgehammers and surprises)

  • Waterproofing (super important unless you like mold as a roommate)

  • Plumbing know-how

  • Tile skills and laser-level patience

DIY saves on labor, but mistakes can get expensive fast. Sometimes hiring a pro isn’t about luxury — it’s about not accidentally flooding your home.


4. What’s the most affordable option that still looks good?

A fiberglass or acrylic insert is the winner here. It’s pre-made, sleek, easy to clean, and install time is fast — usually 1–2 days. Many homeowners opt for these because they solve the problem without breaking the bank.

Pro tip: Get one with a modern matte finish and clean lines to avoid that outdated “builder grade” look.


5. How can I keep the budget under control without sacrificing style?

Glad you asked! Here are a few shower-savvy moves:

  • Use large-format tile – fewer grout lines = less labor

  • Keep your existing plumbing location

  • Choose a semi-frameless glass door instead of fully custom

  • Skip the fancy jets unless you’re really going to use them

  • Install a stylish shower head – it makes a big impact for under $200

Sometimes it’s not about cutting corners — it’s about knowing where to invest for maximum visual payoff.


6. Will replacing my shower increase home value?

Yes — especially if your current shower is… let’s say, “vintage” (and not in a good way).

A new, clean, updated shower improves:

  • Buyer appeal

  • Functionality

  • Daily happiness (very underrated)

In fact, bathroom updates — even minor ones — consistently show strong ROI. According to national remodeling data, midrange bathroom remodels recoup around 60%–70% of the cost at resale.

Plus, you’ll actually want to show guests the bathroom again.


7. Is now a good time to replace it, or should I wait?

If your shower is leaking, cracking, moldy, cramped, or makes you frown every morning — yes, it’s time. Prices for labor and materials fluctuate, but waiting usually just means more damage, more cost, and more shower envy when you visit friends.

And hey, you deserve a bathroom you don’t speed-walk through with blinders on.


🧼 Final Thoughts: Upgrade Your Shower, Upgrade Your Life

You don’t need a celebrity renovation crew to get this done. You just need the right plan, the right materials, and maybe a sense of humor for when the old tile crumbles faster than your patience.

Shower replacement costs can seem intimidating, but with smart choices and a bit of style savvy, you can turn that outdated corner of your home into something beautiful, functional, and even a little luxurious.

Because trust me — few things feel as satisfying as stepping into a shower that doesn’t leak, creak, or scream 1994.

Shower Replacement Costs

Thinking About a Sacramento Bathroom Remodel? These FAQs Might Just Convince You

Thinking About a Sacramento Bathroom Remodel? These FAQs Might Just Convince You

Let’s be honest—no one wakes up saying, “You know what sounds fun? Ripping out tile and dealing with contractors.” But if you’ve been tolerating that leaky faucet, cramped shower, or 1980s peach-colored sink… it’s time.

As Ty Pennington would say: “Move that attitude!”

Because the truth is, a Sacramento bathroom remodel isn’t just about resale or resale value—it’s about living better. And below, we’ve rounded up the most common questions (and real answers) to help you get from “should we?” to “why didn’t we do this sooner?”


❓Why should I remodel my bathroom now?

Because putting it off won’t make the mildew disappear. A bathroom remodel boosts comfort, improves daily function, increases energy efficiency—and yes, raises your home’s value. Plus, Sacramento home values are holding strong. Upgrades made now pay off later.


❓How much does a Sacramento bathroom remodel cost?

On average:

  • Basic Refresh: $8,000–$15,000

  • Mid-Range Remodel: $20,000–$35,000

  • High-End Custom: $40,000–$70,000+

Sound like a lot? Think about what you use daily—your shower, your sink, your lighting. Would you accept this level of inconvenience in your kitchen? Didn’t think so.


❓What adds the most value in a bathroom remodel?

  • Walk-in shower with frameless glass

  • Double vanity with storage

  • Heated floors (hello, winter mornings!)

  • Energy-efficient lighting and fixtures

  • Updated plumbing and ventilation systems

These aren’t just pretty—they’re powerful upgrades that make your bathroom more livable and valuable.


❓Do I really need a professional?

Short answer: YES.
Unless you enjoy rerouting plumbing under a flashlight, working with permits, and explaining to your insurance why your “DIY demo” took out half the subfloor—hire licensed professionals.

A good Sacramento contractor will:

  • Pull permits

  • Meet code

  • Deliver long-term results

  • Help you avoid costly mistakes


❓What design trends are actually worth it?

Forget flashy. Go functional and timeless:

  • Light, neutral tile

  • Matte black or brushed brass hardware

  • Backlit mirrors

  • Custom niche shelving

  • Wall-hung vanities for a sleek, modern look

Ty would tell you: “Trendy is fun, but smart is forever.”


❓How long will it take?

  • Planning & design: 2–3 weeks

  • Permits: 1–2 weeks (Sacramento is efficient, but plan ahead)

  • Build: 4–8 weeks depending on scope

You’ll survive it. Prep a coffee corner in another room, stock up on patience, and keep your eyes on the prize.


✅ Final Thought

A Sacramento bathroom remodel isn’t just a project—it’s an opportunity. A chance to fix what’s broken, upgrade what’s outdated, and build a space that fits your life right now.

Don’t wait for leaks or listing day. Remodel because your mornings deserve better. And your home? It deserves to shine.


🧰 CALL TO ACTION

Ready to make your bathroom better?
Let our Sacramento remodeling team bring energy, precision, and expert planning to your project—Ty Pennington style. Book your consult today.

Thinking About a Sacramento Bathroom Remodel? These FAQs Might Just Convince You

Countertops: A Formal and Luxurious Guide to Elevated Surfaces

Countertops: A Formal and Luxurious Guide to Elevated Surfaces

In high-end residential design, few elements carry as much weight—both visually and functionally—as the choice of countertops. They serve as the primary working surfaces in kitchens and bathrooms, yet also play a leading role in defining the sophistication of a space.

Drawing inspiration from Bryan Baeumler’s appreciation for craftsmanship and durability, this formal guide examines how to select countertops that offer both luxurious appeal and lasting performance.


Material Excellence: The Foundation of Luxury

Selecting the right material is paramount. Each option delivers a different aesthetic and practical experience.

Material TypeAdvantagesConsiderations
Natural Stone (Marble, Granite)Unique patterns, timeless beautyRequires sealing, maintenance
QuartzNon-porous, consistent color patternsLess natural variation
QuartziteNatural durability, high-end appearanceLimited availability, cost
Porcelain SlabsUltra-durable, heat and stain resistantProfessional installation required
Solid Surface (e.g., Corian)Seamless look, repairableSusceptible to heat damage

Formal Note: In luxury settings, natural stones like marble and quartzite remain unmatched in prestige, but high-performance engineered surfaces are increasingly respected for their resilience and ease of care.


Design Considerations: Beyond the Surface

Countertops influence not only the visual identity of a space but also its usability.

  • Edge Profiles: Waterfall edges, mitered returns, and thick slab appearances contribute to a sense of substantiality and refinement.

  • Finish Options: Honed, polished, or leathered textures impact both aesthetics and maintenance needs.

  • Color Palettes: Soft neutrals, dramatic dark tones, and subtle veining patterns create focal points without overwhelming the design.

Bryan Baeumler’s Guideline: Luxury is achieved when beauty is paired seamlessly with function.


Investment and Value

According to the National Association of Realtors (NAR):

  • High-end countertop upgrades can yield up to a 60-80% return on investment at resale.

  • Kitchens featuring premium materials consistently sell faster and at higher price points.

Insight: While the initial cost may be considerable, the durability, performance, and design impact often justify the investment over time.


Installation: Precision Is Paramount

Professional installation ensures:

  • Accurate templating to minimize seams

  • Secure attachment and weight distribution

  • Proper sealing to protect against staining and etching

Formal Recommendation: Always engage licensed fabricators and installers familiar with the specific requirements of your chosen material.


Final Thoughts

Countertops are more than surfaces—they are tactile expressions of craftsmanship, design philosophy, and investment in quality living. Whether one seeks the timeless allure of natural stone or the innovative beauty of engineered options, a thoughtful approach ensures a space of enduring luxury and function.

Call to Action

Embark on your journey to sophisticated living with our curated selection of premium countertops and expert installation services. Allow us to help you build a foundation of beauty and durability.

Countertops: A Formal and Luxurious Guide to Elevated Surfaces

Shower Enclosures: A Minimalist & Inspirational Approach to Timeless Design

Shower Enclosures: A Minimalist & Inspirational Approach to Timeless Design

Lighting is not a decorative afterthought—it’s a critical component of functional and beautiful kitchen design. Choosing the right kitchen lighting installer is just as important as picking the perfect pendant. Done properly, professional lighting enhances workflow, mood, and the overall value of your home.

This guide will walk you through why installation quality matters, backed by industry data and Genevieve Gorder’s commitment to smart, intentional design.


Why Kitchen Lighting Installation Matters

According to the National Kitchen & Bath Association (NKBA):

  • 85% of homeowners cite poor lighting as a key reason for kitchen dissatisfaction.

  • Kitchens with layered, well-installed lighting see a 12-18% higher resale value compared to kitchens with basic overhead fixtures.

Key Insight: Lighting affects how we perceive color, space, and even cleanliness. Subpar installation can undermine even the best design.


Types of Kitchen Lighting That Require Professional Installation

Lighting TypePurposeInstallation Consideration
Ambient (Ceiling)General illuminationCentered placement, wiring planning
Task (Under-cabinet)Focused workspace lightingHidden wiring, optimal height setup
Accent (Spotlights)Highlight design featuresAngling and beam spread adjustment
Decorative (Pendants)Visual impact, mood settingWeight support and precise leveling

Professional Tip: Layered lighting—ambient, task, and accent combined—creates the most versatile and luxurious kitchen environments.


Top Mistakes a Pro Installer Will Help You Avoid

  • Misaligned fixtures that disrupt symmetry

  • Improper electrical load calculations leading to circuit overload

  • Poorly placed switches (like turning on the island light from across the room)

  • Inconsistent color temperature between bulbs

Data Point: Studies show that improper fixture placement can reduce perceived kitchen size by up to 15%.


Material and Fixture Quality Matter Too

Choosing the right installer also means getting advice on fixture durability:

  • UL-listed products ensure safety and compliance

  • Dimmable LED systems save energy and increase ambiance

  • Moisture-rated fixtures are crucial near kitchen sinks or stove areas

Design Note: Genevieve Gorder emphasizes blending form with function—your lights should not only work beautifully but also look beautiful.


Finding the Right Kitchen Lighting Installer

When hiring, look for:

  • Licensed and insured electricians

  • Portfolio of completed kitchen projects

  • Knowledge of local codes and permit requirements

  • Willingness to collaborate with your designer or general contractor

Authoritative Rule: Never compromise on installation expertise. A good installer doesn’t just “hang a light”—they sculpt the way your kitchen lives and feels.


Final Thoughts

Choosing the right kitchen lighting installer is as essential as choosing the right light fixtures. Installation impacts performance, safety, and style—and it’s the difference between a kitchen that feels “fine” and one that feels extraordinary.

Call to Action

Ready to elevate your kitchen lighting? Our trusted network of professional installers can ensure every beam, bulb, and switch shines exactly the way you envisioned.

Kitchen Lighting Installer: A Data-Driven and Authoritative Guide to Getting It Right

Kitchen Lighting Installer: A Data-Driven and Authoritative Guide to Getting It Right

Wood Cabinet Refinishing: Renew Your Kitchen with Timeless Charm

Lighting is not a decorative afterthought—it’s a critical component of functional and beautiful kitchen design. Choosing the right kitchen lighting installer is just as important as picking the perfect pendant. Done properly, professional lighting enhances workflow, mood, and the overall value of your home.

This guide will walk you through why installation quality matters, backed by industry data and Genevieve Gorder’s commitment to smart, intentional design.


Why Kitchen Lighting Installation Matters

According to the National Kitchen & Bath Association (NKBA):

  • 85% of homeowners cite poor lighting as a key reason for kitchen dissatisfaction.

  • Kitchens with layered, well-installed lighting see a 12-18% higher resale value compared to kitchens with basic overhead fixtures.

Key Insight: Lighting affects how we perceive color, space, and even cleanliness. Subpar installation can undermine even the best design.


Types of Kitchen Lighting That Require Professional Installation

Lighting TypePurposeInstallation Consideration
Ambient (Ceiling)General illuminationCentered placement, wiring planning
Task (Under-cabinet)Focused workspace lightingHidden wiring, optimal height setup
Accent (Spotlights)Highlight design featuresAngling and beam spread adjustment
Decorative (Pendants)Visual impact, mood settingWeight support and precise leveling

Professional Tip: Layered lighting—ambient, task, and accent combined—creates the most versatile and luxurious kitchen environments.


Top Mistakes a Pro Installer Will Help You Avoid

  • Misaligned fixtures that disrupt symmetry

  • Improper electrical load calculations leading to circuit overload

  • Poorly placed switches (like turning on the island light from across the room)

  • Inconsistent color temperature between bulbs

Data Point: Studies show that improper fixture placement can reduce perceived kitchen size by up to 15%.


Material and Fixture Quality Matter Too

Choosing the right installer also means getting advice on fixture durability:

  • UL-listed products ensure safety and compliance

  • Dimmable LED systems save energy and increase ambiance

  • Moisture-rated fixtures are crucial near kitchen sinks or stove areas

Design Note: Genevieve Gorder emphasizes blending form with function—your lights should not only work beautifully but also look beautiful.


Finding the Right Kitchen Lighting Installer

When hiring, look for:

  • Licensed and insured electricians

  • Portfolio of completed kitchen projects

  • Knowledge of local codes and permit requirements

  • Willingness to collaborate with your designer or general contractor

Authoritative Rule: Never compromise on installation expertise. A good installer doesn’t just “hang a light”—they sculpt the way your kitchen lives and feels.


Final Thoughts

Choosing the right kitchen lighting installer is as essential as choosing the right light fixtures. Installation impacts performance, safety, and style—and it’s the difference between a kitchen that feels “fine” and one that feels extraordinary.

Call to Action

Ready to elevate your kitchen lighting? Our trusted network of professional installers can ensure every beam, bulb, and switch shines exactly the way you envisioned.

Kitchen Lighting Installer: A Data-Driven and Authoritative Guide to Getting It Right

The Space Dilemma: How a Sacramento Home Addition Solved the Clutter, Without Sacrificing Style

Wood Cabinet Refinishing: Renew Your Kitchen with Timeless Charm

The Problem: A Beautiful Home With Not-So-Beautiful Storage Solutions

When homeowners Rachel and Ian reached out, they were feeling squeezed—not emotionally, but physically. Their 1960s Sacramento ranch home was flooded with natural light, layered with personality, and filled with charm… but increasingly short on usable space.

“We loved our home. But every closet was bursting, and the living room looked like a toy store exploded,” Rachel said.

Sound familiar?

This wasn’t just a mess. It was a structural mismatch—the kind of issue many families face after years in a home they love. They didn’t want to move. But they did need room to breathe.

The Solution: A Minimalist Addition That Let the Home—and Family—Breathe

Instead of adding a large, sprawling wing, Rachel and Ian explored smarter solutions through Sacramento home additions. The key? Purpose-built space and minimalist design that wouldn’t disrupt the home’s existing character.

The plan was simple in footprint—but intentional in execution:

  • A 280 sq. ft. side addition housing a flexible “bonus” room

  • Built-in, wall-spanning storage to eliminate the need for bulky furniture

  • An extension of the living space, not a departure from it

  • Custom cabinetry inspired by Minimalist Design principles: flat panels, push-latch doors, clean lines, zero hardware

Analytical Breakdown: Before vs. After

FeatureBeforeAfter
StorageDisconnected closets and cluttered bookshelvesSeamless wall of integrated cabinetry
Space FlowCramped and closed offOpen, connected extension with matching flooring
LightingOverhead fixture onlyLayered lighting: recessed + floor-level ambient LEDs
StyleMismatched with original homeUnified through subtle Minimalist finishes

 Why Minimalist Design Was the Game-Changer

Minimalism doesn’t mean cold. Done right, it means refined, calming, and deeply functional.

The addition included:

  • Hidden compartments for toys, tech, and seasonal items

  • Floating shelving for display, without visual weight

  • A neutral color palette that blended seamlessly with the existing home

  • One focal wall of minimalist built-ins from DreamLine Cabinetry that did everything—from storage to style statement

This wasn’t just about adding square footage—it was about adding clarity to how the family used their space.

The Outcome: Style Meets Purpose

What once felt chaotic now feels curated. And more importantly—it’s sustainable.

“I used to feel like I had to clean constantly,” Ian admitted. “Now everything has a place. And it’s beautiful.”

Their addition didn’t scream for attention. It blended. It enhanced. It let the original home shine while solving a growing family’s biggest challenge.

Final Thoughts from Candice

Not every solution is about more.
Sometimes the answer is less, better.

If you’re exploring Sacramento home additions, consider this:

  • Do you need more rooms, or better-functioning ones?

  • Can you expand without overwhelming your existing aesthetic?

  • Is your design working for you—or just filling space?

Minimalist Design isn’t about subtraction—it’s about elevation. And when your addition adds more purpose than clutter, you know you got it right.

tailored storage units
Refacing cabinets Rocklin CA

Wood Cabinet Refinishing: Renew Your Kitchen with Timeless Charm

Wood Cabinet Refinishing: Renew Your Kitchen with Timeless Charm

When your kitchen cabinets show signs of wear but still have good structural integrity, wood cabinet refinishing offers the perfect solution. This process rejuvenates the natural beauty of your wooden cabinets without the expense or waste of a full replacement. At Rocklin Kitchen Reface PRO, we specialize in transforming your existing cabinets into stunning focal points that reflect your personal style.


What Is Wood Cabinet Refinishing?

Wood cabinet refinishing involves restoring the original surface of your cabinets through cleaning, sanding, staining, or painting. This method is ideal for homeowners looking to update their kitchen affordably while preserving the natural character of wood.


Benefits of Refinishing Your Cabinets

  1. Cost-Effective: Refinishing is significantly less expensive than replacing cabinets.
  2. Sustainable: Keeps your existing cabinets out of the landfill, reducing waste.
  3. Customizable: Choose from a variety of finishes, stains, or paints to achieve your desired look.
  4. Quick Turnaround: Refinishing typically takes less time than a full remodel.
  5. Preserves Character: Retain the unique grain patterns and charm of real wood.

Popular Finishes for Wood Cabinets

  1. Natural Stain: Enhance the natural grain and warmth of the wood.
  2. Painted Finish: Create a modern or classic look with colors like white, navy, or gray.
  3. Distressed Finish: Add a rustic touch with an aged or weathered appearance.
  4. Glossy Finish: Achieve a sleek, contemporary feel with high-gloss lacquer.
  5. Two-Tone Designs: Combine contrasting colors for a dynamic, stylish look.

The Refinishing Process

At Rocklin Kitchen Reface PRO, we follow a meticulous process to ensure flawless results:

  1. Inspection: Assess the condition of your cabinets and recommend the best refinishing options.
  2. Cleaning: Remove dirt, grease, and grime for a clean surface.
  3. Sanding: Smooth the wood and eliminate imperfections.
  4. Staining or Painting: Apply your chosen finish to enhance or transform the wood.
  5. Protective Coating: Seal the surface with a durable topcoat to ensure longevity.

When to Choose Refinishing

Refinishing is an excellent option if your cabinets are structurally sound but have surface-level damage, such as scratches, fading, or outdated finishes. It’s a practical choice for homeowners who want to refresh their kitchen without the cost and complexity of a full renovation.


Complement Your Refinishing Project

To maximize the impact of your refinished cabinets, consider pairing the project with other small upgrades:

  • New Hardware: Install modern knobs, pulls, or hinges.
  • Lighting Updates: Add under-cabinet or pendant lighting for enhanced ambiance.
  • Backsplash Refresh: Replace or repaint your backsplash for a cohesive look.
  • Countertop Refinishing: Update your countertops for a complete transformation.

Why Choose Rocklin Kitchen Reface PRO?

At Rocklin Kitchen Reface PRO, we are committed to delivering quality craftsmanship and exceptional customer service. Our team works closely with you to understand your vision, recommend the best finishes, and execute the project with precision. With years of experience and a passion for design, we ensure your refinished cabinets will look stunning and last for years to come.


Conclusion

Wood cabinet refinishing is an affordable, sustainable, and stylish way to revitalize your kitchen. Whether you prefer a natural wood finish or a bold new color, this process can breathe new life into your space. Trust Rocklin Kitchen Reface PRO to handle your refinishing project with care and expertise, creating a kitchen you’ll love.

Wood Cabinet Refinishing: Renew Your Kitchen with Timeless Charm

Energy-Efficient Home Remodeling Ideas to Lower Your Bills

Remodeling your home with energy-efficient upgrades not only helps lower your utility bills but also reduces your carbon footprint. By integrating sustainable design elements, you can enhance your home’s comfort, increase its value, and contribute to a greener environment. Whether you’re replacing windows or adding insulation, there are plenty of energy-saving home improvements to consider. Here are some key ideas to make your home more energy-efficient and environmentally friendly.

1. Upgrade to Energy-Efficient Windows

Old windows can be a major source of energy loss, allowing heat to escape in winter and letting warm air in during the summer. Replacing them with energy-efficient windows can drastically reduce your heating and cooling costs. Look for windows that are:

  • Double or triple-paned for improved insulation
  • Low-emissivity (Low-E) to reduce heat transfer
  • Energy Star certified to meet high-performance standards

Energy-efficient windows help maintain a consistent temperature in your home, reducing the need for constant heating or cooling.

2. Add or Upgrade Insulation

Proper insulation is crucial for keeping your home comfortable and energy-efficient. Insulation helps maintain the desired indoor temperature by preventing heat loss in the winter and heat gain in the summer. Focus on areas that tend to lose the most energy, such as:

  • Attics: Adding insulation in the attic can prevent heat from escaping during the colder months.
  • Walls: Insulating the walls can help regulate temperature and prevent drafts.
  • Basements and crawl spaces: These areas are often overlooked but can be major sources of energy loss.

Consider using spray foam insulation for hard-to-reach areas or blow-in cellulose for attic spaces. Better insulation keeps your home warmer in the winter and cooler in the summer, reducing the need for air conditioning and heating.

3. Install a Smart Thermostat

A smart thermostat is an easy-to-install, energy-saving upgrade that automatically adjusts the temperature in your home based on your schedule and preferences. With a smart thermostat, you can:

  • Control the temperature remotely from your smartphone or other devices.
  • Set schedules for when you’re home and away, ensuring the HVAC system isn’t working when you don’t need it.
  • Learn your preferences over time, optimizing energy use for comfort and savings.

By adjusting your home’s temperature when needed, you can significantly lower your energy consumption and reduce your utility bills.

4. Upgrade to Energy-Efficient Appliances

Another effective way to reduce energy consumption is by upgrading your old appliances to energy-efficient models. Look for the Energy Star label, which indicates that the appliance meets the government’s efficiency standards. Common upgrades include:

  • Refrigerators: Newer models consume far less electricity compared to older ones.
  • Washing machines and dryers: Energy-efficient washers use less water and electricity, while newer dryers dry clothes faster and with less energy.
  • Dishwashers: Modern dishwashers use less water and energy to clean dishes effectively.

Though the initial cost of upgrading appliances may seem high, the long-term savings on energy bills often make them worthwhile.

5. Improve Lighting Efficiency

Switching to LED lighting can make a significant difference in your home’s energy consumption. LED bulbs use far less energy than traditional incandescent bulbs and last much longer, reducing both energy use and the cost of replacing bulbs. Here are a few lighting upgrades to consider:

  • Install dimmer switches: Dimmer switches allow you to adjust lighting levels, reducing energy usage when full brightness isn’t necessary.
  • Use motion sensors: In hallways, bathrooms, or outdoor areas, motion sensors ensure lights are on only when needed.
  • Replace outdoor lighting: Consider solar-powered garden lights or LED fixtures for outdoor spaces.

By making simple lighting upgrades, you can reduce your home’s overall electricity consumption.

6. Seal Air Leaks and Gaps

Air leaks are common culprits in energy loss. Sealing gaps around windows, doors, ducts, and pipes can prevent warm or cool air from escaping and reduce the need for constant heating and cooling. Some areas to check for leaks include:

  • Windows and doors: Check for gaps and replace weatherstripping or caulk where necessary.
  • Attic hatches and vents: Ensure these areas are sealed to prevent air from escaping.
  • Ducts: Leaky ducts can cause your HVAC system to work harder, leading to higher energy consumption.

Sealing air leaks is a low-cost but highly effective way to improve your home’s energy efficiency.

7. Consider Solar Panels

If you’re looking to make a bigger investment, solar panels are a powerful way to reduce your dependence on traditional energy sources and lower your utility bills. Solar panels harness the sun’s energy to generate electricity, which can be used to power your home. In many cases, excess energy can be sold back to the grid, allowing you to offset your costs even further. While the initial installation cost can be significant, tax incentives and long-term savings on energy bills make solar panels a worthwhile consideration.

8. Invest in Cool Roofing Materials

If you live in a hot climate, installing cool roofing can help lower your energy bills by reflecting more sunlight and absorbing less heat than traditional roofing materials. Cool roofs can keep your home cooler in the summer, reducing the need for air conditioning. Options for cool roofing materials include:

  • Reflective shingles: These shingles are coated with materials that reflect sunlight.
  • Cool metal roofs: Metal roofs are inherently reflective and can be coated with special coatings for even greater efficiency.

A cool roof can reduce your cooling costs and increase the comfort of your home during hot months.

9. Consider Landscaping for Energy Efficiency

Your landscaping choices can also contribute to your home’s energy efficiency. Strategically placed trees, shrubs, and vines can provide natural shade and reduce the amount of heat that enters your home. Consider the following:

  • Plant shade trees on the south and west sides of your home to block direct sunlight.
  • Install trellises or vines near windows to provide additional shading in the summer.
  • Use evergreen trees as windbreaks to protect your home from cold winds in winter.

By making smart landscaping decisions, you can reduce the need for heating and cooling and lower your overall energy costs.

Energy-Efficient Home Remodeling Ideas to Lower Your Bills